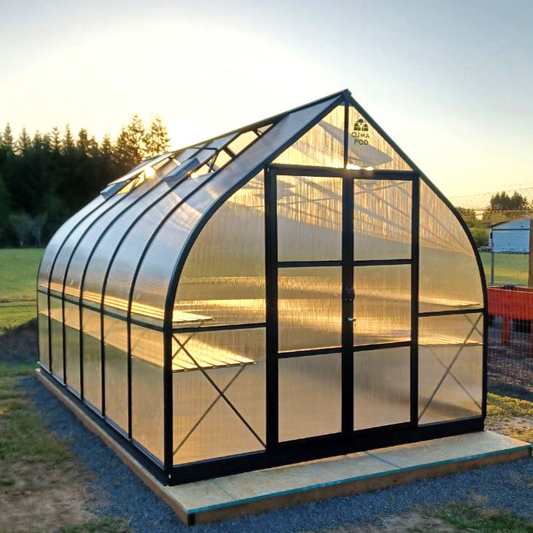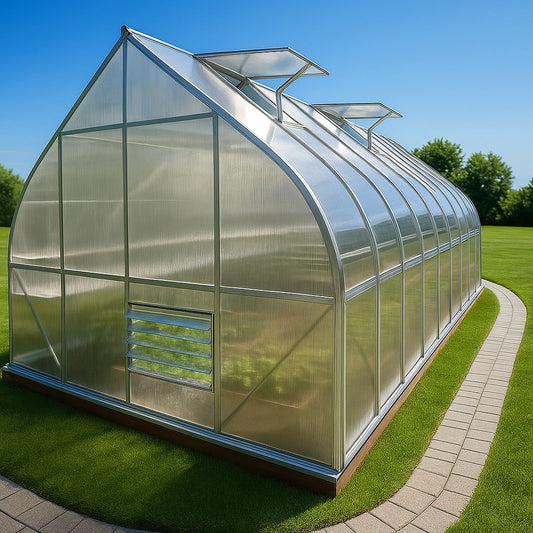

How to Prepare Your Garden for a Fall Greenhouse Installation
You've picked out the greenhouse. Maybe it's already sitting in boxes in the garage, or a delivery date is circled on the calendar. What most people don't plan for is the two or three weeks of ground work that decide whether that structure serves you well for the next decade or fights you from the first hard frost on. Fall is a genuinely good window for this kind of project, cooler air to work in, settled soil, a full off-season to shake out any problems before a single seedling depends on the space, but it only pays off if the site, soil, and timing get handled before the frame goes up, not after.
Why Fall Is Actually a Good Time to Build
Most people picture greenhouse construction as a spring project. Snow melts, the ground softens, and suddenly everyone wants a structure up in time for tomato season. That instinct isn't wrong, exactly, but it crowds every installer's calendar into a six-week window and leaves gardeners scrambling to prep beds at the same time they're starting seeds indoors.
Fall sidesteps most of that. The ground is often easier to work than it was in early spring: it's had a whole growing season to settle, and if you're in a region with clay-heavy soil, autumn moisture levels tend to sit in that sweet spot where the ground isn't bone-dry and cracked but also isn't waterlogged mud. Cooler air temperatures make physical labor, digging, leveling, hauling gravel, a lot more tolerable than doing the same work in July.
There's a horticultural argument for fall installation too. A greenhouse frame going up in September or October gives you the entire off-season to test how the structure handles wind, condensation, and temperature swings before you've got a single seedling riding on it. You find the drafty seam, the spot where snow load pools, or the door that doesn't seal right, and you fix it on your own schedule instead of mid-February with a flat of lettuce starts depending on it.
None of this means fall is universally better. If you're in a region where the ground freezes hard by mid-November (much of USDA Zones 3 through 5), your prep window is genuinely short, and a late start can mean working against frozen soil before the structure's even anchored. Timing matters more than the season itself, and we'll get into exactly how to work that out.
Reading Your Site Before Anyone Breaks Ground
Before you touch a shovel, walk your yard the way a horticulturist would rather than the way a homeowner picking a spot for a shed would. The site decisions you make now are largely permanent. Moving a greenhouse after the fact is expensive and, frankly, rare.
Sun exposure, but not the way you'd guess
The instinct is to find the sunniest corner of the yard and stop there. That's a reasonable starting point, but check sun exposure specifically for fall and winter, not for July. The sun's angle drops considerably by late autumn, and a spot that gets full sun in summer can end up in a neighboring building's or tree line's shadow by November. Watch the site across a few different times of day for a week or two if you can, and note where shadows fall as the afternoon wears on.
South-facing sites generally collect the most consistent light through the low-sun months, which matters if you're planning to grow through winter rather than just extend a fall harvest. East-facing exposure gets you strong morning light, useful for warming the structure early in the day, but loses out by mid-afternoon.
Drainage: the thing nobody thinks about until water's pooling under the bench
Standing water is probably the single most common site problem gardeners discover after the fact. Walk your proposed site after a hard rain and see where the water actually goes. If it collects and sits rather than draining within a few hours, that's not automatically a dealbreaker, but it does mean you'll need to grade the site or add a French drain (a gravel-filled trench with a perforated pipe that channels water away from a low spot) before construction rather than after.
Wind exposure
Wind matters more to a greenhouse than most other garden structures because it directly affects heat retention and the structural load on glazing (the transparent or translucent panels, whether glass, polycarbonate, or greenhouse-grade plastic film, that cover the frame). A site that's fully exposed to prevailing winter winds will lose heat faster and put more stress on the frame and door seals. If you can't avoid an exposed site entirely, a windbreak, even something as simple as a row of shrubs or a fence panel, on the prevailing wind side can measurably cut heat loss.
Getting the Soil Ready While You Still Have Access
Here's something a lot of gardeners overlook: once the greenhouse frame is up, working the soil underneath and around it gets a lot harder. Tilling equipment doesn't fit through a greenhouse door. Amending soil in a cramped footprint with hand tools is slow, awkward work. Fall installation gives you a real advantage here, because you can do the heavy soil work while the site is still wide open.
Start with a soil test if you haven't done one in the past two or three years. A basic test tells you pH and major nutrient levels, and most state agricultural extension offices offer inexpensive testing through the mail. If you're growing in-ground inside the greenhouse rather than exclusively in raised beds or containers, this is worth doing properly rather than guessing.
Fall is also the ideal time to work in slow-release amendments. Compost, aged manure, and other organic matter benefit from months to break down and integrate before you're planting into that soil. Dig them in now, water them in, and let winter do some of the work for you. If your soil test came back showing a pH imbalance, lime (to raise pH) or sulfur (to lower it) both need time to react with the soil, sometimes several months, so fall application gives those amendments a real head start before spring planting.
What about soil-borne pests and pathogens?
Because greenhouse soil stays warmer and more humid than open garden beds, it can concentrate certain soil-borne problems, root-knot nematodes, fusarium wilt, that sort of thing, if the site had a history of them. If you know your chosen site has had recurring disease issues in past seasons, fall is the time to address it: solarization (covering soil with clear plastic to raise temperatures high enough to kill many pathogens) needs weeks of strong sun, which is harder to get once daylight starts shrinking, so it's really more of a late-summer task if you're planning ahead for a fall build.

Clearing, Leveling, and Laying the Groundwork
Every greenhouse, from a small hobby kit to a full-size structure, needs a level, stable base. Skipping this step or rushing it is probably the single most common regret among first-time greenhouse owners.
Start by clearing the footprint completely: sod, roots, rocks, and any debris. If you're removing turf, strip it a few inches beyond the planned structure's edges so you're not fighting grass regrowth right against the base for years afterward.
Leveling comes next, and this is where patience pays off. Even a slight slope, something you might not notice by eye, can throw off door alignment, cause water to pool on one side of the structure, and put uneven stress on the frame over time. A line level or a laser level makes this dramatically easier than eyeballing it. For larger structures, many installers recommend a gravel base topped with pavers or a poured concrete footing, both of which improve drainage under the structure and give the frame something solid to anchor into.
Anchoring against wind and frost heave
Frost heave, the upward movement of soil as water in it freezes and expands, can shift a poorly anchored foundation over winter. This is a bigger concern in colder zones with heavy clay soil, which holds more water than sandy soil and heaves more as a result. Anchoring options range from simple ground stakes for lightweight kit greenhouses to poured concrete footings that extend below the frost line for permanent structures. Your local frost depth (available from your extension office or building department) tells you how deep footings need to go if you're pouring concrete.
Utilities, Access, and the Boring Stuff That Matters
This part of the prep list isn't glamorous, but skipping it causes more mid-season headaches than almost anything else on this list.
- Electrical access: If you're planning to run heaters, fans, supplemental lighting, or a heat mat for seed starting, figure out your power source before construction, not after. Running conduit or a weatherproof extension line is far easier with the site open.
- Water access: A hose bib or rain barrel near the greenhouse saves an enormous amount of hauling once you're watering daily through winter. If you're in a freeze-prone zone, plan for how you'll winterize or insulate any exposed water lines.
- Vehicle and material access: Confirm there's a clear path for delivery trucks or equipment to reach the site. This sounds obvious until someone discovers a gate is two inches too narrow for a pallet of glazing panels.
- Local permitting: Some municipalities require a permit for permanent greenhouse structures above a certain size, and setback rules (how far a structure must sit from property lines) vary by jurisdiction. Check before you build, not after an inspector asks about it.
Working Around Your Local Frost Dates
Timing a fall installation isn't just about picking a pleasant weekend. It's about working backward from your local frost dates and the specific tasks that need dry, unfrozen ground.
Your average first frost date (available through your local extension office or several online frost date calculators, searchable by zip code) is the anchor point. From there, count backward:
- Soil testing and amendment work: 6–8 weeks before you want the structure operational, since amendments need time to integrate.
- Site clearing and leveling: 3–5 weeks before construction, weather-dependent.
- Concrete footings, if you're using them: poured at least 2–3 weeks before the ground is expected to freeze, to allow proper curing time.
- Frame construction and glazing: ideally completed before your first hard frost, giving you a buffer if weather delays push the timeline.
Gardeners in warmer zones, say Zone 8 and up, have considerably more flexibility here, since hard ground freezes either don't happen or arrive much later in the season. If you're gardening in Zone 4 or colder, the honest advice is to start this process in late summer rather than waiting until October, because your workable window closes faster than it feels like it should.

What to Move, Divide, or Protect First
If your greenhouse site currently has established plants, perennials, shrubs, even a section of an existing vegetable bed, you'll want a plan for them well before construction starts.
Perennials generally transplant best in early fall, giving roots several weeks to establish before the ground freezes, which is one more reason fall greenhouse projects and fall garden transplanting tend to line up well. Divide overgrown perennial clumps at the same time if they need it; you're already disturbing the soil, so it's efficient to handle both tasks together.
Shrubs and small trees are a different calculation. If something's been in the ground more than a few years, transplanting comes with real risk of shock or failure, and it may be worth consulting an arborist or simply accepting the loss if the plant is inexpensive to replace. For anything valuable or sentimental, root-pruning the season before an eventual move (cutting a defined root ball a few months ahead of transplanting to encourage new feeder root growth close to the trunk) dramatically improves survival odds, but that's a decision that needs to be made well ahead of your installation date, not the week before.

Mistakes That Show Up After the Structure Is Already Up
A few problems tend to repeat across first-time greenhouse installations, and nearly all of them trace back to a prep step that got skipped or rushed.
Another recurring issue: gardeners prep the soil and foundation beautifully, then forget to plan bench or bed layout until the structure's already framed. Walk your intended interior layout out with stakes and string before construction if you can. It's a lot cheaper to move a stake than a finished bench.
And one that's easy to miss entirely: not accounting for snow and ice shedding off the roof. A greenhouse roof sheds snow load somewhere, and if that somewhere is directly onto a walkway, a water spigot, or next year's garden bed, you'll find out the hard way during the first real snowfall.
What to Realistically Expect That First Season
Even with careful prep, a first winter in a new greenhouse is a learning season, not a finished system. Expect to adjust ventilation timing as you learn how the structure actually behaves on sunny versus overcast days. Expect a few plants to struggle in spots you assumed would be fine, corners tend to run colder than the center, and benches near the door catch more draft than benches don't. That's normal, and it's exactly the kind of feedback a fall installation gives you time to absorb before you're depending on the space for a full season's harvest.
Soil that was amended in fall will generally be workable and biologically active by the time spring planting rolls around, one more argument for doing that work early rather than scrambling in March. And any foundation or drainage issues that were going to show up, will typically have shown up by then too, giving you a full winter's worth of real-world testing before the stakes go up.
A greenhouse is a long-term structure, and the weeks you spend prepping the ground before it goes up are, in a real sense, the most important growing you'll do all year. Get the site, soil, and timing right in the fall, and the structure has a genuine chance to earn its keep for years rather than fighting you from day one.