DIY Polycarbonate Greenhouse Frame Assembly: A Step-by-Step Guide for Home Gardeners
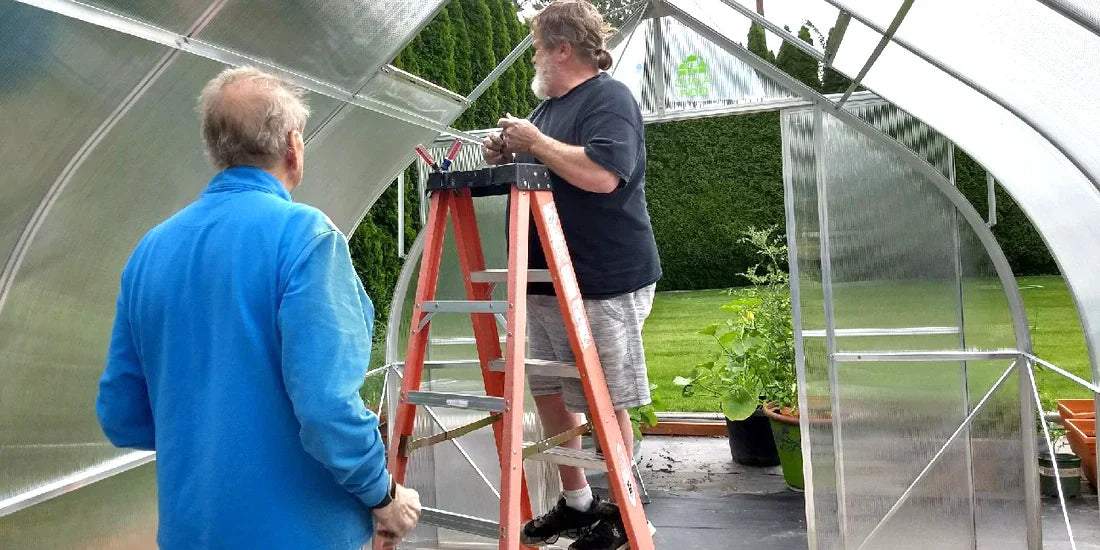
If you're planning to assemble a polycarbonate greenhouse yourself, you'll primarily need a screwdriver and a wrench. Most ready-made greenhouse kits come with all the necessary fasteners and a clear assembly diagram. This guide will walk you through the general steps, whether you're using a kit or constructing your own from scratch (though custom builds require prior detailed drawings and material calculations).
General Assembly Instructions for Polycarbonate Greenhouses
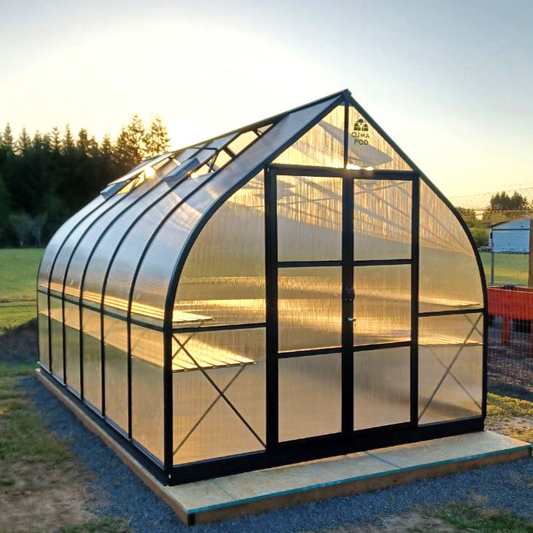
Begin the frame assembly by starting with the end sections. Typically, door and window frames, along with any reinforcing bars, are attached to these end arches. Next, assemble the parts of the lower base frame and attach T-shaped ground anchors (or 'legs') to it. This base frame, with its supports, is then placed into a shallow trench. Ensure the top of the base frame sits approximately 4 inches above the surrounding ground level. At this stage, it's crucial to check for horizontal alignment and make any necessary adjustments before proceeding with further assembly.
If your greenhouse is being mounted on a permanent foundation, such as a timber beam, ensure the frame's profiles are securely fastened to the beam using steel angle brackets. For added waterproofing, consider laying a vapor barrier or roofing felt not just around the sides, but also directly underneath the foundation beam. Additionally, any structural elements that will be in contact with the ground should be treated with a wood preservative (for timber) or a rust-resistant coating (for metal) to protect against corrosion and pests.

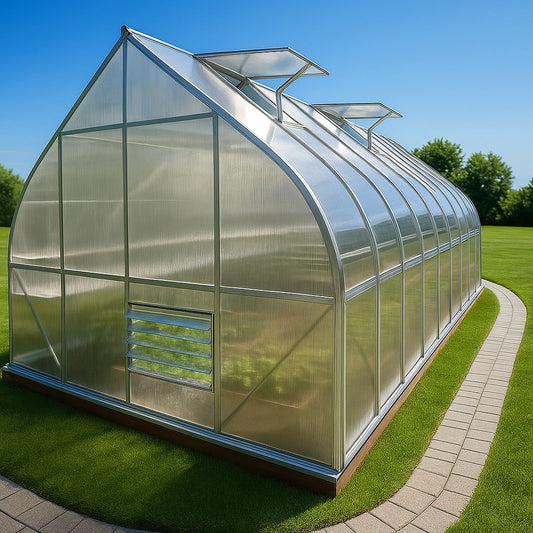
Once the base is secure, attach the remaining frame arches to the base frame. Now it's time to install the polycarbonate sheets. When attaching polycarbonate, pay close attention to the protective film: ensure the side with the UV-protective layer faces outwards. This film should ideally be removed *after* installation but *before* prolonged exposure to direct sunlight; otherwise, the sun's UV rays can 'bake' the film onto the polycarbonate, making it extremely difficult to remove later.

Start installing the polycarbonate sheets from the end sections. It's often easiest to attach full rectangular sheets to the end frame, then carefully cut out the precise shapes for the door and window openings using a utility knife, trimming excess material along the frame's outline. After cutting the openings, secure the pre-assembled door and window units into their designated spots.

For the main body of the greenhouse, polycarbonate sheets should be laid horizontally (across the arches) and without overlap, as multi-wall polycarbonate is designed for butt joints. Create these joints using special connecting H-profiles or aluminum capping strips. These profiles are usually secured to each arch at multiple points. Alternatively, you can overlap the entire greenhouse with long, narrow aluminum strips and secure them with self-tapping screws, ensuring a snug fit that compresses the polycarbonate panels.
To further protect your greenhouse and deter insects, it's advisable to create a perimeter barrier around the base, extending about 2 inches above ground level. This could be a blind area of crushed stone or gravel. For greenhouses without a concrete foundation, consider adding an additional timber base frame. Timber treated with a wood sealer or bituminous coating will act as an excellent barrier against pests and significantly enhance the greenhouse's resistance to strong wind gusts. Finally, if your greenhouse remains assembled over winter, remember to regularly clear accumulated snow and ice from the roof to prevent the frame from bending and the polycarbonate from cracking. It's also wise to leave the doors open during winter in unheated greenhouses to allow the ground to freeze solid, which can prevent structural damage from frost heave.

Polycarbonate is a popular and excellent material for building greenhouses, including those without a permanent foundation, due to its inherent strength, stability, and insulating properties.